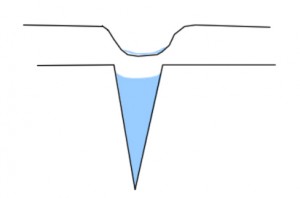
There are three basic tools for scrimshaw:
- a scribing tool
- magnification
- strong light
Scribing tools come in many shapes and sizes, from traditional engraving tools (“gravers”) to custom tools made specifically for scrimshaw (such as the Coulter Precision tool available on Etsy). Other tools people use include x-acto blades, pin vise and a needle, and custom tools made from wooden dowels to sewing needles to sharpened piano wire.
 In order to scrimshaw effectively, you need to be able to pierce or scribe the ivory or other material deep enough to hold the pigment with enough of a depth and severity that when you wipe away the excess pigment, the intended line or dot stays filled with the pigment. The dull tool (trough) can easily have it’s pigment removed when wiping away the excess due to the rounded edges and lack of depth. The sharp tool creates a deep enough “ravine” to capture and hold the pigment. The difference is only fractional millimeters in depth, but the shape of the incision makes all the difference.
I appreciatred your comment on depth of the cuts and stippling in order to guarantee a crisp image on inking.
Wonderful site, I’m just learning Scrimshaw.
The purpose for me is to decorate knife
Handles.
Hi James, and thanks for visiting. If you find anything is unclear, please reach out via email to questions@scrimshaw.com, I’ll be glad to help.
–Andrew