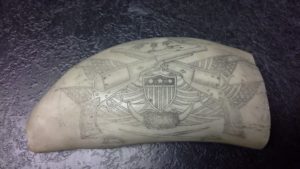
Tag: scrimshaw

Brighten up “Reverse Scrimshaw” With This Technique

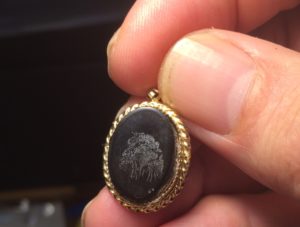
Lion "Reverse Scrimshaw" on water buffalo hornAfter doing several “reverse scrimshaws” – scrimshaw on a dark material where the stipples/incisions are filled with a white pigment, I found they looked kind of dull.  From experiments a couple of years ago using “Pearl-Ex”, I knew mixing it into the pigment only made a slight difference.

This time, I coated the surface with an acrylic paint (oil paint should work the same), then wiped it off while it was still wet.  With a Q-Tip, I lightly brushed some of the Pearl-Ex (micropearl – smallest white particles I was able to find) onto the surface then wiped it off so the particles would adhere to the wet paint in the stipples while the rest would wipe away.  It made a big difference no matter what angle you hold the piece now. Available at many local art supply stores and at Amazon.com (Pearl-Ex Micropearl)


Starting a New Scrimshaw

Starting a New Scrimshaw

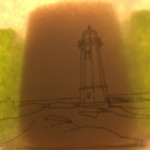
Galalith cabochon taped behind the image of a lighthouse
Galalith taped behind the image


Finally starting a new piece of scrimshaw!  It’s been awhile, and I needed something away from most of the electronics.  With the phone in my back pocket and turned off so I don’t accidentally dial anyone (“Sorry, I fat – er – fingered the phone and hit your number….”). I started the lighthouse that I really liked by Dennis Jarvis (see previous post).  Sadly the crashing waves to the left are off the picture, but I may take artistic license and create similar waves closer to the lighthouse itself.

I debated on whether or not to sketch it on, but with such a tight schedule I opted for the “Whaleman’s Way” – putting the “tooth” shaped piece of galalith behind the picture, securing it in place and piercing through the picture.  After a few more pieces I’ll probably sketch something on a piece and go totally freehand.

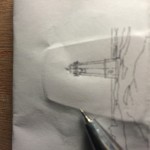
lighthouse image on paper, pierced through the lines into the galalith underneath
Pierced Lighthouse

It doesn’t take a lot of pressure to get through and make an indentation. As you do more pieces you get a feel for the right amount. Most of my stipple-dots are pretty even, thanks in part to the modified Coulter Precision scribe (via Etsy).  I’ve tried a steel point with another project I’m working on, though the length makes it difficult to do perpendicular dots with my current low-power microscope (if anyone wants to buy me an opti-visor for Christmas, I’ll gladly call you Santa!).


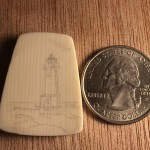
Lighthouse stippled onto galalith cabochon next to a quarter
Lighthouse initial phase completed.

Wiping away a small smear of oil paint revealed not only the lighthouse, but a small scratch that will become a distant cloud when I’m done.  That’s all for tonight, back to the 12-14 hour days I currently call my week.  Will post further as the lighthouse takes shape.

Clicking on the pictures will reveal them in full size.


2015-11-01

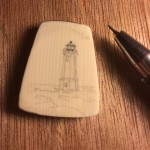
Scrimshaw lighthouse on galalith with tool to the right
Roof and lines darkened

Darkened in the roof and lines, added some initial shading to the building itself.  May continue on as it’s cold and wet outside, and I need to take a break from the computer today.  My hands are doing better after decorating 50+ cookies for my daughter’s school’s “Men Who Cook” event.  My wife (who is the owner of hilltowncookies.com) needed help since she baked the cookies along with her mom and her hands ache more than mine making the cookies themselves. Piping the decorative icing on the cookies took about four hours, but they came out great.

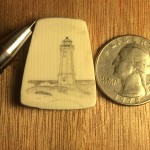
Lighthouse scrimshaw on galalith with a quarter to the right to show the scale
Added some shading and started in on the shoreline.

Added more shading this afternoon and worked in the wave at the edge.  Note to self: don’t make the horizon line during initial scrim – I could have had larger waves crashing if I hadn’t done that. This is going to be one of those pieces where I will go over the whole thing several times darkening areas to add more detail, then darkening other areas to balance it.  It’s a good piece to get my hand and eyes back in shape, since I have a couple of large pieces coming up. I’m still debating on lines, stipples or a combination on the large piece, and I still have the Kraken ogling me to my left, so when I finish this one, he’s next!


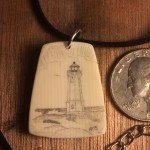
Finally done, on a faux leather 20″ necklace.  Added the clouds and the seagull, all done in stipple style with the exception of the initials.  Now: on to the Kraken!

Lighthouse Done
Subtle clouds in the background and the ever-present seagull. On a faux leather necklace.

Lighthouses, Ghosts and Selling Scrimshaw

Point of Ayr Lighthouse, Wales
Photo Credit: Lukasz Lukomski, cc-sa-3.0

“A scrimshaw without a story is just scratches on bones.” – Saul T.; Sailor


Okay, I made that up, though if you think about it awhile you’ll find it’s basically true. Visiting an old whaling town and walking the decks of the Charles W. Morgan and learning her story, most people would be compelled to pick up a memento of their vacation. Memories of a trip to the cape with a loved one could be revisited with the bracelet or the key fob.

While most of us don’t live in Mystic seaport or on Cape Cod, if we’re creating scrimshaw to sell at a craft fair or on line, a memorable story about the subject of your work is far more interesting than “I saw a picture of a ship and I scrimshawed it.”

A story for every piece would be next to impossible for most of us, especially if you’re selling multiple pieces such as jewelry, but for some of the larger pieces a story can be compelling and may bring you more sales, giving you something to talk about. With jewelry, many pieces should be without a story – so people can make their own. Scrimshaw of a twelve point buck will illicit hunting stories, a modern ship or boat the stories of that time on that shore when that thing happened, a rose the love interest or the lover who presented it, or perhaps the silent look into the distance, hopefully with a slight smile.

I’d come across a picture of a lighthouse on the Point of Ayr in Wales. The first article was of the hauntings and got me intrigued. The pics were clear and great for creating some scrimshaw from. The next article described a couple who had come there on their 50th wedding anniversary and asked the person who was painting it to take their picture, as this was where they had their first kiss. Ah, memories.

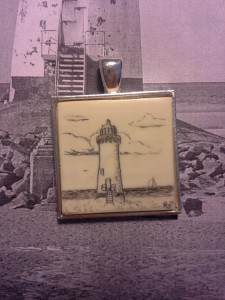
Scrimshaw based on the Talacre lighthouse.I based my scrimshaw on this picture, adding a ship in the background and a seagull, leaving the rocky outcroppings aside. After I’d finished it, I looked back at the pictures I’d seen and found there was one I liked a little more than the first, so I’ll probably scrimshaw the second view shortly. The first one was head-on, the second you can see the stairway a bit better and I find it more interesting, and I’ll also review the stories and find a few others so my mind and my mood are on the subject.


Corian: Ivory Alternative

Originally Posted in the Scrimshaw.com Newsletter 2014-09-14

Corian is a material most often used for countertops and sink tops made by DuPont.

The material is an acrylic polymer mixed with alumina trihydrate (ATH). ATH is suspended throughout the material giving it a uniform color.  They are able to create patterns as well, from a pebble-like surface to granular in appearance.

Being a stain and abrasion resistant material, it offers benefits and challenges to scrimshanders.

Corian polishes to a high lustre with progressive sanding and polishing and you can create an almost mirror-like finish if you take the time (see notes at the bottom for a link to polishing pads that go progressively to 12,000 grit).

Finding Samples of Corian

Samples are often available at big-box stores such as Home Depot and Lowes in the states, but they don’t just hand out free samples, you have to have a genuine interest in the material to make it worth their time. If you are or have a larger project in mind, you may be able to ask for some 2″ x 2″ blocks of the type you intend to scrimshaw on and they may give them to you. If you really just want some of the material for scrimshaw and don’t want to “shuck and jive” the sales person there are a couple of other options:

  • You can find a place that makes custom counter tops in your area and see if they either have samples or scraps they’re willing to part with (otherwise the waste material goes into landfills)
  • You can visit Dupont at http://www.surfaces.dupont.com/ and navigate to the place that allows you to get samples
  • You can purchase a sheet of corian from https://www.inventables.com/technologies/white-corian for about $27 as of the time of this writing.  We’d recommend going with the ¼” unless you’re making knife handles or pens.
  • Look on eBay – search for corian ¼”


There are several scrimshaw artists that are already using corian for their art, including:

Nick Finocchio (https://www.etsy.com/shop/ScrimshawEverything),

Dmitri Burakov (https://www.etsy.com/people/BDSart?ref=owner_profile_leftnav),

Katherine Plumer (http://www.katherineplumer.com/scrimshaw/closeups/fine_art/jessie.html)

and others.


Pigment Tests

We sanded then polished our sample with 600 grit, 1000 grit, 2000 grit sandpapers then polished it with the HUT PPP wax polish and let it sit for one day. Having misplaced the Sharpie pen (which I recall does stain the material), we instead used India ink, an Aquarelle pencil and oil paint.  All wiped off cleanly.


Stipple and Scratch Tests

For the stipple and scratch tests, we used our favorite Coulter tungsten scribe, and lightly stippled and scratched the surface. We found the material tends to “dust” more than crater with a light touch, and with the scratch tests it once again “dusts” rather than curl or create “rows and furrows” like some of the softer materials. Still the material seems softer than casein or ivory, probably due to the physical makeup of powdered ATH suspended in acrylic.

After hastening the drying time slightly with a blow dryer (the oil paint was still wet) we carefully wiped the sample away.

India ink is the clear winner here, the aquarelle pencil tended to ride above the scratches, though held well in the stipples and the oil paint wiped out of the stipples and scratches fairly easily, leaving little pigment.

Stain Test - Corian.jpg

Stipple and Scratch Test - Corian.jpg

A Tip from One of Our Readers:

“Hi Andrew,

I was reading with great interest on how to seal the items you sent me.

I remembered that I used a similar process when I was turning wood and pens.  Whenever I found a soft spot on antler or wood, I would fill it with a thin glue and use an accelerator to harden it and continue cutting.  I used some of this thin glue on one of them, let it soak in good and used the accelerator to harden the glue and then sanded it down up to 12,000 grit.  It looks great and will be ready when I get a little better at scrimming.

Here is a site with some info on the glue:

http://www.woodcraft.com/category/3/1005233/1001221/Glue%20and%20Glue%20Accessories.aspx

As I said, this was just a thought I came up with.

Have a wonderful day.

George Hester – Newbie but getting better”


Thanks again George, we’ll have to try the accelerator on some antler or bone the next time we get a chance.

Found another use for “Poster Putty”.  We’ve been using it to hold scrimshaw material in place as we scrim, but when it comes to inking the little vials I like to mix them in often end up sideways (which is why I’ve been banished from the kitchen table for all things non-food).  A small dab of poster putty will hold the vial or anything else spillable fast, even if you bump into it.  Available at most pharmacies and at Amazon.com.

Tipped ink vial (left) and one with poster putty on the bottom holding it fast.

You can sign up for the newsletter for free to get the latest tips, techniques and information by clicking on the link in the upper right of this page and entering your name and email.