How-To Scrimshaw a Dragon – Videos

How-To Scrimshaw a Dragon – Videos


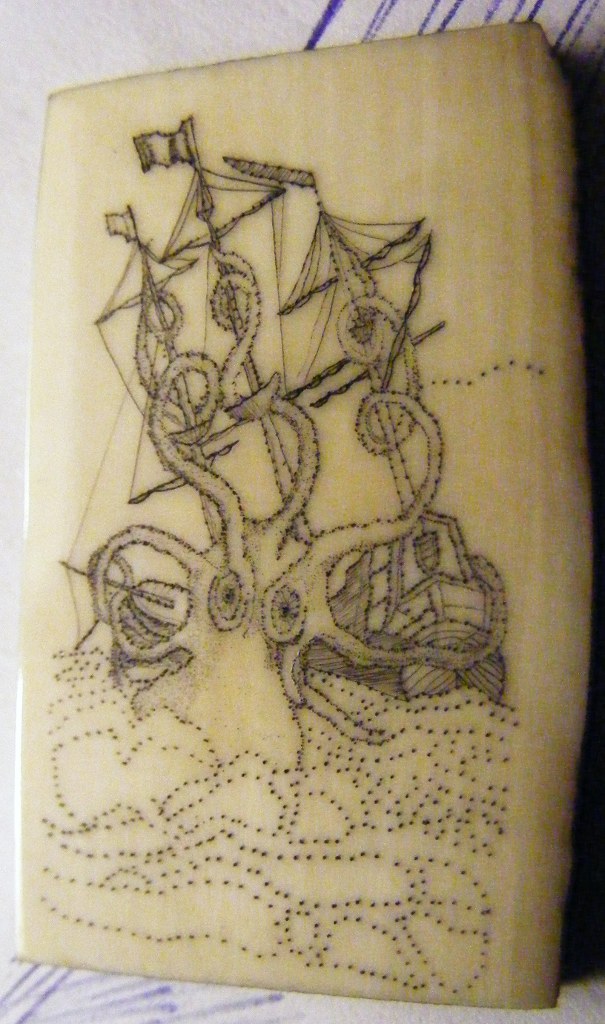
Awhile back, I had made some videos of creating a scrimshaw based on a dragon tattoo.  This step by step video is broken into three parts.

How to Scrimshaw a Dragon – This is one of many ways of transferring your art to ivory. Here, we use a variation of the “graphite paper” technique.

Transferring Your Art to the Ivory – This is the technique taught by my teacher when we were using pre-embargo elephant ivory.  I’ve kept this here because it is a starting point but recommend NOT slathering on the ink like it was peanut butter, and NOT rubbing off the ink with the folded cardboard! Instead, I recommend using a 000 brush to go over the lines if you are using ink, and a slightly dampened cotton ball once the ink is dry to remove the excess ink.  Better yet is using oil paint, which we hope to switch to completely in our kits real soon.

Adding Color to Your Scrimshaw – The final step is adding color to your scrimshaw.


Kraken Blog – More Shading

Kraken Blog – More Shading


Adding more shading, you can see that in many ways, you are destined to work with the darkest(deepest) stipple-dots you created when you first began your piece.  The initial dots were done with my original tool, just sharpened, while the subsequent work was done with the Coulter tool (see tools section). It will take a few more pieces before I am familiar with this new tool and can master it’s subtleties. with an angle of approximately 20 degrees going to an incredibly sharp and hard point, this tool will pierce paper effortlessly and create a dot on a piece of ivory with little trouble.  Experience will allow a subtler initial stipple-dot so shading can be made more realistically. Click here for a larger view

Stereo Microscope for Scrimshaw (and soldering)

Stereo Microscope for Scrimshaw (and soldering)

Stereo Microscope with a Boom Arm perect for scrimshaw
Stereo Microscope with a Boom Arm

This is a classic low-power microscope. The binocular 10X-20X stereo microscope on a boom-arm with a light gives clear sharp images. It’s widefield eyepieces, 45° inclined eye tubes and rubber eyeguards ensure an easy observation. The boom-arm stand allows you to turn the microscope head around two different axis (X and Z). This microscope offers high resolution, widefield of view and extremely large working distance (9″). The incident light shines down onto objects for the observation of surface details and fine scribing or stippling.

Available from Amazon.

Kraken Blog – Starting the Rigging and Shading

Kraken Blog – Starting the Rigging and Shading


Late evening shot of the scrimshaw with "Squidward's" noggin having been shaded with stipple-dots.

Kraken scrimshaw-beginning rigging and shading the masts

Scrimshawing the details consists of choosing what to add, what to leave out and what to postpone ’til later.  The rigging seemed a good place to start this morning, with the exception of the “rat lines” (rope ladders, per http://phrontistery.info/nautical.html).  With much of the rigging and all the wrapped sails now complete, the shading of the masts pretty well in place, it’s time to start on Squidward.  Please note the difference in the color of the ivory is due to the lighting at the time – I am not “antiquing” the ivory. There’ll be several more pics on flikr, but for now I need to get to the store for more domestic endeavors.

Kraken Blog – Masts are up, Planks are Set

Kraken Blog – Masts are up, Planks are Set

Scrimshaw of the Kraken as of 2012-04-15 Masts and planks completedA little time this morning to work on the Kraken, I am using a line technique on most of the ship, and staying with the stipple technique on “Oscar” – or whatever I decide to call him.  According to some legends the Kraken was either just a giant octopus or a cross between a squid and a crab.  Either way, you’d have to boil a lot of water to cook him.  Photographed here on the remnants of one of my favorite t-shirts (much to my wife’s satisfaction!) in the full sun. Since the garden awaits, I’ll be putting it away for awhile again, and tend to other matters. The scrimshaw artists page has been added and updated, please don’t be shy if you would like to be included here.