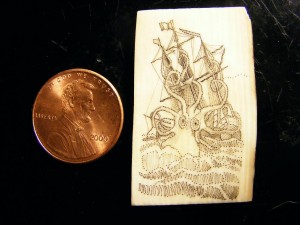
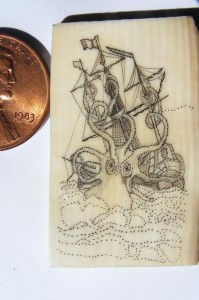
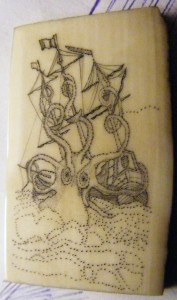
This is a flash based collage made on VuVox showing the kraken from initial “wrap” to it’s latest incarnation. Far from complete, it’s interesting to see how it’s progressed over time.
This is a flash based collage made on VuVox showing the kraken from initial “wrap” to it’s latest incarnation. Far from complete, it’s interesting to see how it’s progressed over time.

Finished the rat lines, started the waves. On the original, the waves were created as many fine lines for the dark water leaving areas blank for the white caps. The upper right where I started I scribed very lightly, and as I went across and down, I became more aggressive. The lower right is just about perfect, though I will have to work in the stipple dots to minimize their prevalence. The mid-left did not fill in very well, and I realized I was scribing them at an angle instead of straight up and down, so the oil paint wiped right out.

From this point the work will be balancing the light and dark, creating thicker lines and adding more stipple dots to shade “Squidward” – right now he’s looking a bit anemic when I look at the piece unaided by a magnifying glass. A looming question will also be how to present the piece once it’s done?

 If you have been looking for scrimshaw patterns, we will be hosting several of them at scrimshaw.com. It can be especially daunting for the beginner to find a pattern or template to scrimshaw, and a great place to start is the iconic lighthouse.
The lighthouse is an historic part of the maritime landscape from as far back as 260 B.C. with the lighthouse of Alexandria. Warning sailors of rocky shores, guiding them through fog as well as a beacon of civilization, lighthouses served the maritime community throughout history. Most modern lighthouses operate automatically. Some lighthouses are also run as bed and breakfasts or vacation houses (see http://lighthouse.cc/links/overnight.html). The only time a lighthouse can be less than romantic is when the fog rolls in, and the foghorn starts to blow. Those who used to run lighthouses say they would get used to it, talking in between the soundings, and even sleeping through a foggy night!
There is a non-profit organization, the Beacon Preservation, Inc. which is dedicated to the preservation of lighthouses and their environments for educational, cultural, recreational, and historical preservation purposes. Their mission is to ensure that communities, civic organizations, and educational and research institutions are able to enjoy access to these important icons of nautical history. You can find out more about them at http://www.beaconpreservation.org/content/publish/default.shtml.
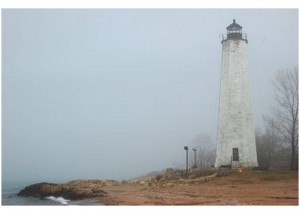
The lighthouse pictured is in New Haven, CT – Lighthouse Point Beach – January, 2007(photo credit: Chris Amelung –
http://www.flickr.com/photos/amelungc/355355109/sizes/l/in/photostream/(link) CC Creative Commons Attribution License. Chris’ site is
http://www.flickr.com/photos/amelungc/
Clicking on the Lighthouse-Template will bring up a pdf which you can download and print out. There will be several sizes of the traced template varying from 1/4″ high to a 2″x3″ with the background. You can use these templates on anything from piano key ivory (often used as bookmarks) to lightswitch plates or other materials.
Cut out the size that fits your material and secure it in place with tape.
Using a sharp tool, you can pierce the paper and make a dot on your ivory, making dots every 16th of an inch or so, creating a “dot-to-dot” (kids will sometimes use the school’s compasses – the type used to make circles, not to find true north) to do this.
Once you have gotten most of the template pierced, remove the paper.
You can see the dots easier if you fill them in by wiping oil paint across the surface then wiping it away, this will leave the paint in the impressions you created.
From here, you can continue putting stippled dots between the dots already there, or scribe from dot-to-dot to get the initial picture. Fill in a small area with dots or scribed lines, then coat and wipe the area with oil paint (or India ink). Using the large original picture as a guide you can then create the shadows, or get creative and add a different shoreline, add a ship in the harbor, or anything else you desire.
Here’s a link to another picture of the lighthouse from Tony Fischer Photography
Write to us at “questions@scrimshaw.com” and let us know what you are looking for, we’ll be glad to get you started.

 Rat lines are the rope ladders the sailors use to climb up the masts to tie down, release and maintain the sails and rigging of a ship. On the hapless ship in this illustration, all of the sails were tied, showing many of the ropes and the arms (legs?) of the Kraken. Used the straight edge of a postcard to steady many of the lines and went freehand with the horizontals. While not in the original picture, the rat lines on our scrimshaw are being squeezed more firmly above the central crow’s nest. Filled in a bit more of “squidward” but I don’t want to further shade the head since the ocean has not been touched yet. Next step will most likely be completing the rat lines, then the ocean. Still unsure about the background – I had put the mountain horizon on the upper right, so either the mountains will be there or some clouds.

Awhile back, I had made some videos of creating a scrimshaw based on a dragon tattoo. This step by step video is broken into three parts.
How to Scrimshaw a Dragon – This is one of many ways of transferring your art to ivory. Here, we use a variation of the “graphite paper” technique.
Transferring Your Art to the Ivory – This is the technique taught by my teacher when we were using pre-embargo elephant ivory. I’ve kept this here because it is a starting point but recommend NOT slathering on the ink like it was peanut butter, and NOT rubbing off the ink with the folded cardboard! Instead, I recommend using a 000 brush to go over the lines if you are using ink, and a slightly dampened cotton ball once the ink is dry to remove the excess ink. Better yet is using oil paint, which we hope to switch to completely in our kits real soon.
Adding Color to Your Scrimshaw – The final step is adding color to your scrimshaw.